
Preserving an animal hide you’ve harvested as a memento of the hunt only requires you to be patient, have the correct ingredients and follow a few simple steps to achieve a pleasing result.
My most recent tanning effort came after I’d taken my grandson out for his first fallow deer. Anthony was so excited he asked if he could have the skin tanned as a trophy of the trip.

After removing the skin to tan for my little hunting buddy, we butchered the deer for meat and headed for home.
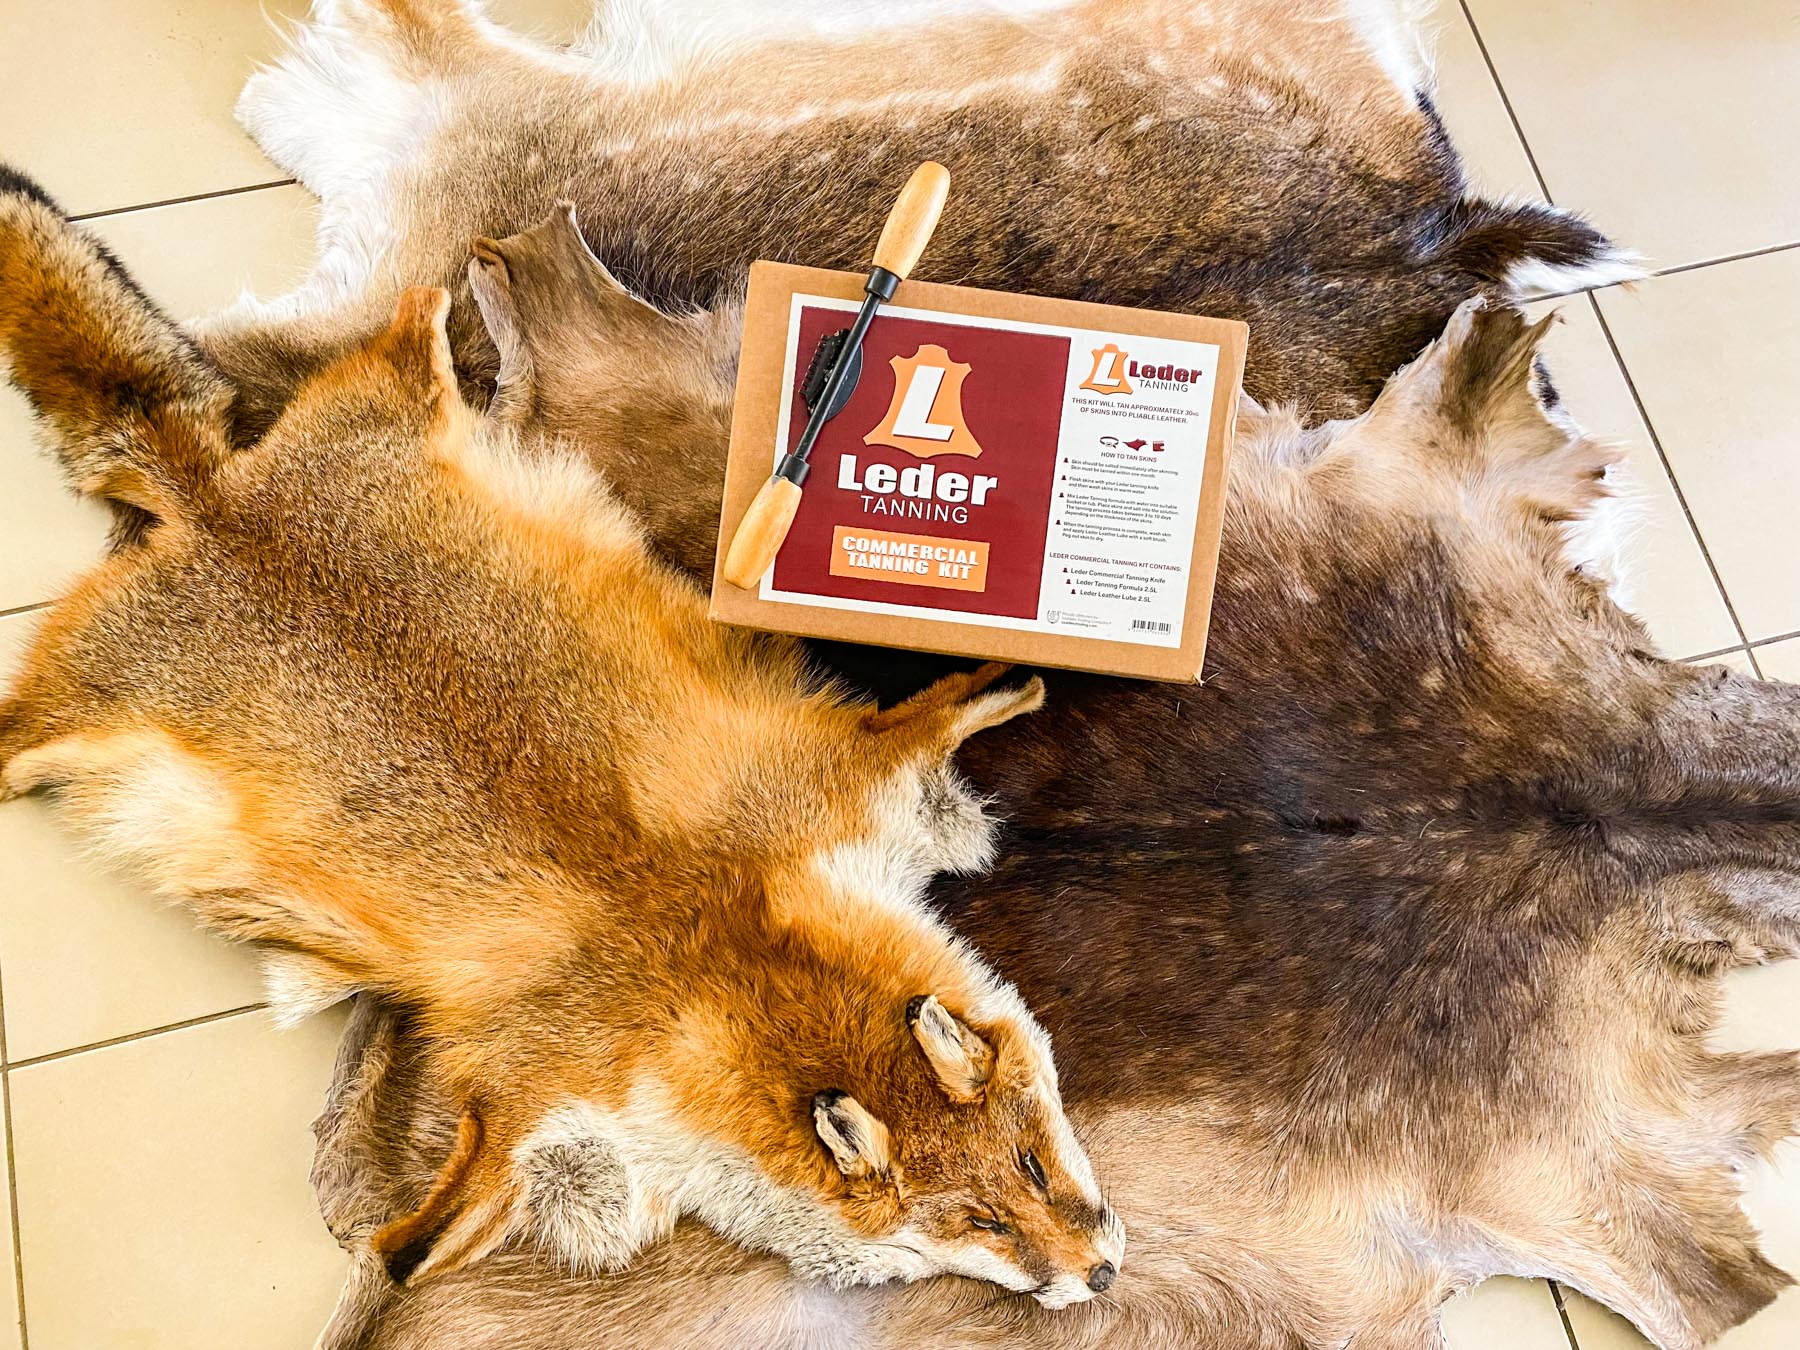
There are many ways you can tan a skin. In the old days, using the animal’s brains as a tanning paste got the job done. Some people swear by various types of tree bark. I went the simply way with a commercial tanning formula, in this case Leder’s tanning kits, which are available in two sizes from most gun shops Australia-wide.
Leder’s Utility Tanning Kit offers enough tanning formula and leather lube to tan approximately 6kg of skin. The larger Leder Commercial Kit contains 2.5 litres of tanning solution and leather lube for bigger jobs of up to about 30 kilos of skins.
Both kits come with a fleshing tool, but the Commercial kit has a slightly better model, in my opinion, as it features dual grips. As I had several skins to tan, including a beautiful winter fox and other hides of my own, I decided to go for the commercial kit to get the job done. I was only going to tan two or three skins per batch to keep the workload down.
The tanning process for furred skins requires four basic steps from start to finish. These include salting, fleshing, tanning and breaking the skin using the supplied leather lube. While Leder offers some basic instructions with the kit, I did a little extra research to ensure I’d get the best results possible. The following is how I tackled the task.

STEP 1: SALTING
After skinning is complete, allow the hide to cool off in the shade, then trim any excess meat or lumps of fat from the skin. Large chunks of meat or fat left on the hide when salting prevent the salt from penetrating the skin, causing hair slip on the fur side.
If the skin has a lot of blood, scrape it off the flesh side and carefully wipe it dry on the fur side. Don’t wash it with water as this can cause bacteria to form.
Next, give the flesh side of the skin a liberal coating of salt. A medium-size deer skin will require about 2-3kg of salt initially. Use only flossy or cooking salt, not rock or iodised salt. Ensure you spread the salt evenly and right to the edges, then fold the skin flesh-to-flesh, roll it up and store overnight — 12 to 18 hours is about right.
The following day, shake the salt off and allow the skin to drain for an hour or so over a rail to let any juices and fluid drip off it.

Now apply a generous second coating of salt to the skin right out to the edges and fold it flesh-to-flesh, then roll it up and store in a breathable bag or similar. The skin may now remain in storage out of the sun for several weeks in cooler weather, until you’re ready to continue. I like to move on to step two, fleshing, within a week or so.
STEP 2: FLESHING

Fleshing a skin can be carried out on a bench or over a large log; use your imagination. For this job, I decided to make a proper fleshing beam to lay the skins on. All it took was a few pieces of leftover timber I had lying around and a few screws to hold it together. Then I rounded the edges with a plane.
When your beam or bench is ready, unroll the skin and shake off the salt, then lay the skin over the beam with the neck at the top. I prefer to work from the neck down, however, it really doesn’t matter provided you remove all of the fleshy tissue and any fat.
Work the fleshing knife all the way down the skin until you have fleshed away the excess, then work your way around the edges ensuring the entire skin is clean.
Once fleshing is complete you can wash the skin before tanning. I use dishwashing liquid as it doesn’t contain any bleach. Give the skin a good wash, particularly on the fur side, to remove any dirt or blood residue, then rinse it well with clean water and allow it to drain.

STEP 3: TANNING
The first thing to determine before tanning is how much tanning solution to mix. This is achieved by weighing the skin or skins in their damp condition. You don’t want them dripping wet, nor dry; they do need to be drip-free with excess water squeezed out. That’s when you weigh the skins to calculate the amount of water and tanning formula required for the batch.
Use a plastic bucket or plastic container, as the tanning solution will apparently react with some metals.
Use soft water or rain water as opposed to hard or tap water for the best result.
With all in place, I weighed the wet skins and mixed the correct ratio of water, Leder tanning formula and flossy cooking salt into a large plastic container. Leder specifies 500mL of its tanning formula to 35 litres of clean water. For this you can add a maximum of seven kilos of skins and two kilos of salt to the solution.

Submerge the skins and ensure there are no air pockets trapped in them as this may cause uneven tanning.
Last but not least, check the skins at least twice a day and move them around in the solution to ensure they are fully submerged and tanning evenly. I took the skins out half way through the week to check they were tanning evenly and briefly ran the fleshing knife over each to ensure there was no excess fat or tissue still on them.
Leder specifies 3-10 days for the process, depending on the thickness of the skins. I allowed a full week for my fallow deer skins and they were fully tanned.
The way to check this is by simply making a small nick in the thickest piece of hide, which is generally the neck or the base of the tail. It only needs to be 1-2cm long. Inspect the cut to ensure the full thickness of the skin is blue in colour. If the middle or any part is still white, it’s not fully tanned and should be left for a few days longer.
Once you’re satisfied the skins are fully tanned, remove them from the tanning bath, squeeze the excess tanning formula out and give the skins a final wash using clean, cold water and washing powder; ensure the powder doesn’t contain any type of bleach, as this will discolour the skin.
Finally, hang the skins over a rail to get rid of excess water and prepare to peg them out.

STEP 4: BREAKING
Now that the skins are fully tanned, again, you’ll need to know the weight of each skin so you can calculate the correct amount of leather lube to apply. Too much will result in an oily skin and too little a dry skin, so this step is important.
As I had already made this calculation and written it down when making up the tanning bath, I could move straight on to pegging the skin. For this I used an old sheet of plywood. Before laying the skin hair-side down, I gave each one a brush to ensure it dried with the fur running neatly in one direction, then carefully turned it over to peg out.
To peg the skin I used a spring-loaded staple gun, but small nails will also do the job. Try to ensure you peg the skin out evenly to enable a natural shape once dry. As there were a few small holes in the skins, I also gave them a quick stitch up using the wife’s sewing kit, but we won’t tell her that. Stitching holes while the skin is still wet will create an almost unnoticeable finish once dry.

With the skins pegged out, it was time to apply the leather lube. Leder recommends 120mL of leather lube per kilo of skin weight. So if your skin weighs 4kg you require 480mL of leather lube for that skin.
Standing the boards up, I applied the calculated amount of lube to each of the skins with a paint brush and allowed them to begin the drying process.
Once the skins were about 90 percent dry I removed them from the boards and ‘broke’ the skins to make them soft and pliable. This is achieved by simply running the bladed side of the Leder fleshing knife across the flesh side of the skin in every direction until the hide becomes pliable.
When that’s complete, trim the sides for an even look or whatever shape you desire.
To finish off my skins, I decided to give them a light sanding to remove any burrs or rough spots and I was pleased with the results. Needless to say, so was Anthony.


0 Comments